
Focusing on your iPad Camera: Take 1.5
Hello loyal readers. If you received this for the second time, please forgive! I've had a few technical glitches with my site and am reposting this most recent blog. Thanks for your patience. I hope you find this article and upcoming series inspirational to your teaching. Best wishes from my iPad Piano studio to yours...
With all the available apps, it’s easy to overlook one that is  native to most smart phones or tablets.
Similar to a mirror, the camera serves as a valuable tool of revelation providing instant and accurate feedback.
native to most smart phones or tablets.
Similar to a mirror, the camera serves as a valuable tool of revelation providing instant and accurate feedback.
This opening paragraph I originally wrote for a Clavier Companion article. After writing the article for the must-have-mag (get it here), I decided to expand upon this theme and design a series of posts at 88pianokeys.me dedicated to using the incredibly handy and valuable app--the camera.
Taking a picture or a video involves a few simple steps. Because of the easy and instant accessibility of your iPad camera, I believe it should be considered an essential, back-pocket tool for every lesson. Although my tendency would be to jump right into the countless ways to use the pics and videos you take with the iPad, it seemed best to open the series entitled "Focusing on Your iPad Camera" with a post called "Be Camera Ready" that sheds light on how to operate the camera.
Be Camera Ready
Basic knowledge of how your camera works before using it will save you time and avoid unwanted stress during lessons. The steps below are also featured in the video at the end of the post.
Locate the Camera App

1) Find your camera icon.
2) Since this app will be used regularly, you'll want to place it in your iPad dock. Moving the app to your dock will allow you to access it on any screen. To move the icon, tap and hold on it until all app icons wiggle, then move the app to its new location. Press the Home Button to stop the apps from wiggling.
3) Can't find the camera app? There's a default motion to access your camera: swipe up from the bottom edge of the screen and discover the control panel. You'll see the camera icon on the right-hand side.
Just Like Music, the Camera has Modes
For those who have the most recent iOS upgrade (iOS 8) the app offers 5 different modes on the right-hand side of the screen. Some of these camera modes will not be found on earlier models and iOS systems. Drag your finger over the words on the right to switch modes. Some may be more helpful to you than others but I've included at least one idea for each mode.
Time Lapse
This would be useful if you wanted to record a flower blooming as it magically speeds up any slow-moving event. I'm still pondering how this feature could benefit instruction. However, if you're like me, there's one event I would LOVE to speed up at every lesson. I'm sure parents feel the same way during home practice sessions. Have you ever timed how long it takes a student to find a book, open it up to the correct piece and place it on the piano rack? Check out the video below to see time-lapse in action.
Slo-Mo
There isn't a lesson where I'm not correcting a student's posture or hand position. The clip in the video below shows my son's attempt at playing a C major scale with Piano Maestro. Note: he has not taken lessons for years but as a senior in high school he is drawn to the piano, plays occasionally and agreed to be my "model" pianist for the video. After he watched the clip taken in the Slo-Mo mode and reviewed the correct scale fingering, his technique and hand position improved.
Pano
The panoramic camera mode is pretty cool. Look at this pic I took of my studio. Just switch to PANO mode, tap the button, keep your eyes on the arrow on the screen and turn in a circle! 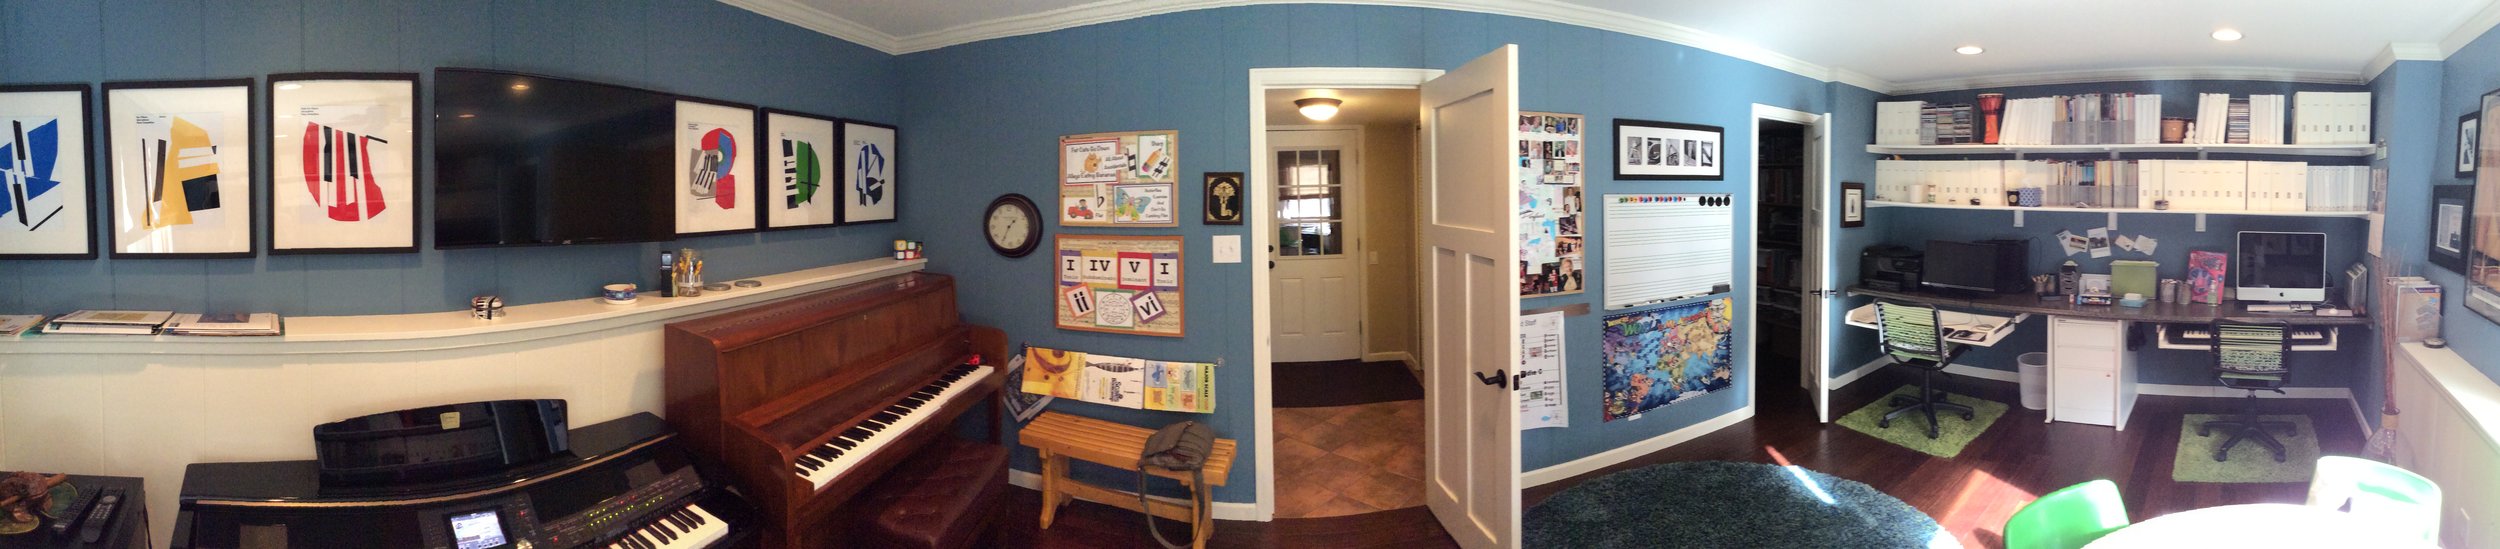
Video
This is the go-to mode that you'll use FREQUENTLY with your students. Specific ideas on how to integrate videos in your instruction are coming in future blogs.
Photo
This is the go-to mode that you'll use THE MOST with your students. Specific ideas on how and when to integrate photos in your studio are coming in future blogs.
Square
If you prefer square photos instead of the typical rectangular shape, this mode will automatically create square images.
Other Camera Tools
The Timer
Want to get in a shot with a student but would rather avoid the unattractive angles of a selfie? The timer will allow you 3 to 10 seconds to dive in front of the lens before the iPad shoots a pic.
Screen Shot
By pushing the Sleep/Wake Button and the Home Button simultaneously, your iPad camera will take a photo of the screen of your iPad. This allows you to save special shots like the "Share the Moment" photos that Piano Maestro offers. Also, if your student completes a SproutBeat worksheet but you don't have time to correct it at the lesson, take a screen shot so you can check it later and email it to parents displaying their child's latest accomplishment.


Mount for Your iPad
To help me shoot videos of myself taking videos so you could see it first hand, I mounted one of my iPads on the Manos Mount. This gadget screws onto any mic stand and let's you mount and angle your iPad camera to most any position. You can order yours by clicking here.

User Guide for Your iPad Camera
Disclaimer: I don't know it all and never will so if you want to learn more specifics about your iPad camera, download this user guide PDF and open it in your iBooks app so you can refer to it when needed.
http://youtu.be/g1wd81RNiCc
Interested in learning more about integrating the iPad camera into your teaching?
Stay tuned..more ideas to come.
-Leila